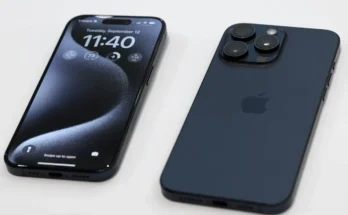
In today’s digital age, privacy has become a growing concern for many social media users, especially when it comes to platforms like Facebook. With the increasing amount of personal information shared online, it’s important to take control of your privacy settings to ensure that only the people you want can see your posts. In this article, we will guide you through the process of using Facebook’s privacy settings on your iPhone to control who sees your posts.
1. Open the Facebook app on your iPhone and log in to your account.
2. Once you’re logged in, tap on the three horizontal lines in the bottom right corner of the screen to open the menu.
3. Scroll down the menu and tap on “Settings & Privacy” and then select “Settings.”
4. In the Settings menu, tap on “Privacy” to access the privacy settings for your account.
5. Under the Privacy settings, you will find several options to control who can see your posts. The first option is “Who can see your future posts?” Tap on this option to customize your audience.
6. You will be presented with a list of audience options, including “Public,” “Friends,” “Friends except,” “Specific friends,” and “Only me.” Choose the option that best suits your preferences.
– If you select “Public,” anyone on or off Facebook will be able to see your future posts.
– If you choose “Friends,” only your Facebook friends will be able to see your posts.
– “Friends except” allows you to exclude certain friends from seeing your posts.
– “Specific friends” lets you choose specific friends who can see your posts.
– “Only me” ensures that only you can see your posts.
7. Once you’ve selected your preferred audience, tap on the back arrow at the top left corner of the screen to save your changes and return to the Privacy settings.
8. Next, scroll down to the “Your activity” section and tap on “Who can see your future posts from others?” This setting controls who can see posts that others tag you in. Choose the audience option that aligns with your privacy preferences.
9. After making your selection, tap on the back arrow to save your changes and return to the Privacy settings.
10. To further customize your privacy settings, you can tap on “Limit past posts” under the “Your activity” section. This option allows you to limit the audience for all your past posts to your current privacy settings.
11. Additionally, you can tap on “Timeline and Tagging” in the Privacy settings to control who can post on your timeline, tag you in posts, and review posts you’re tagged in.
12. Explore the other privacy settings in the menu to customize your Facebook experience and ensure your posts are seen by the right audience.
Remember, it’s essential to regularly review and update your privacy settings to keep up with any changes Facebook may make to their platform. By taking control of your privacy settings, you can have peace of mind knowing that your posts are being seen by the people you trust.
In conclusion, Facebook’s privacy settings on your iPhone offer you the flexibility to control who sees your posts. By following the steps outlined in this article, you can customize your audience and ensure that your personal information remains private. Take the time to review and update your privacy settings regularly to stay in control of your online presence.


